August 31, 2011

Bienvenidos a Miami

Well, as you may have noticed, I did not get around to posting anything while I was in Miami. We can blame that on the fact that sunglare makes my iPhone basically useless poolside, which was where I spent a good portion of my weekend (although I did get in a nice 4 mile walk on the boardwalk/beach with one of the other girls).


But when I wasn't catching some rays*, I was enjoying the fantastic food and nightlife of Miami Beach. As per my usual restaurant pics, the light quality is somewhat lacking, but here is an assortment of some of the great meals I enjoyed during my 48 hour stay.

*Applying SPF 50 every 15 minutes while I lounged in a long-sleeved white cotton cover-up and a giant straw hat.

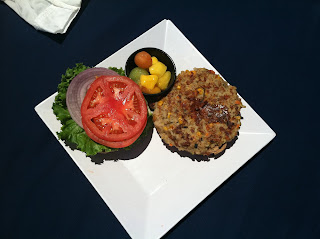
Lunch poolside - delish barley veggie burger. 
Sadly, the fruit cup included mango, which I can't eat.

The "Lychee Lite" - vodka, muddled lychee, white cranberry juice, mint, lime.

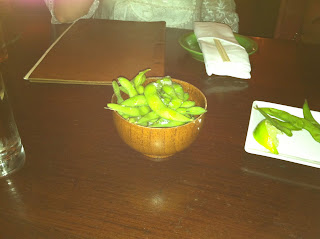
Edamame at Sushi Samba - sushi/Brazilian/Peruvian small plates fusion spot.
(And crazy flash lighting)

Miso-marinated Chilean sea bass with steamed veggies
Sushi Samba

Fun architecture break!

Fried plantains
David's Cafe

The LONG awaited pressed Cuban sandwich, with plantain chips
David's Cafe

A little cafe con leche for the road
David's Cafe

Garlic bread with amazing basil and olive oil dipping sauce
STK - steak house

A nice rose
STK

The filet I shared
STK

This whole group loved broccolini - we ordered two servings
STK

My plate! Too dark to tell, but my glorious filet, green beans, broccolini and truffle-parmesan frites
STK

Fantastic mini-donuts for the bachelorette
There was some fun sparkler action going on, but I didn't get a good picture

My plate, with some chocolate sauces.
STK

And an action shot with the bachelorette.
STK

Sunday brunch poolside - egg white frittata with asparagus, tomato, red onion and goat cheese with a side of home fries

And some lovely fresh fruit.

What an amazing and delicious weekend. :)

August 30, 2011

Meatless Monday: Soba Noodles with Baked Tofu and Ponzu Sauce

Ah, the post-vacation reality check. I was pretty tired when I finally arrived at my apartment at midnight last night. I didn't even unpack most of my stuff and when I got off the Metro this morning the first thing I realized was that I'd left my work ID and office keys at home. Happy Monday!


I had an awesome time in Miami and I promise I will post some pictures of the fantastic food adventures we had (spoiler: I got that pressed Cuban).

But first, it's Monday, which means...new vegetarian recipe! Tonight I tried cooking with ponzu and soba noodles for the first time. Soba noodles are a Japanese buckwheat noodle, similar in shape to a thin spaghetti, but with a slightly stickier texture (and a way awesomer flavor). There are different varieties of soba, which, unfortunately I can't tell you much about, since this is my first time using them. I used a kind with wild yam flour and they were fantastic. Ponzu is a deliciously tangy Japanese citrus sauce.

I hadn't heard of ponzu until I ran across this recipe for a cold soba noodle salad with ponzu sauce on Serious Eats.  It looked pretty tasty in the picture, so I figured I'd give it a try. The original recipe didn't really call for any protein, so I figured I'd add some marinated baked tofu. Since the package of soba that I purchased was smaller than the amount called for in the recipe, I thought I'd stretch it by adding a couple of cups of mung bean sprouts, but alas, when I opened them tonight they'd gone south. The recipe yielded 4 hearty servings though, so no harm done.

Before I realized the bean sprouts were bad :(

But all these yummy things still went in.

The recipe itself was very easy. The only change I made was adding the tofu (recipe below) and substituting crushed red pepper for togarashi (not entirely sure what that is, but it said it was optional and added heat, so I figured I'd use what I already had in the cupboard). The tofu took a while because I pressed it, then marinated it and then baked it, but the noodle part only took about 20 minutes. And, since it can be served cold, this is a good recipe to make ahead for an easy weeknight supper. We'll be enjoying it again tomorrow.

The tofu and its dressing, deconstructed.

Soaking up the goodness.

Baked.

The verdict on taste: amazing! I put sriracha in my tofu marinade and topped the noodles with crushed red pepper flakes. The combo of the ponzu, marinade and spice was really fantastic. MG and I both agreed this would have to go in the recipe book I keep so that I can make it again. It's also a pretty inexpensive meal - although the soba noodles are more expensive than spaghetti noodles, the rest of the ingredients are either pantry items (if you make a lot of Asian food), tofu, and just a couple of fresh veggies.

 
With and without the baked tofu.

Another successful Meatless Monday in the books!

Spicy Baked Tofu

1 package extra-firm tofu, pressed and cut into 1" cubes
1/4 cup soy sauce
2 tsp Sriracha (or to taste)
1 tbsp teriyaki sauce
1 tbsp toasted sesame oil

Preheat oven to 350F.

Whisk together the soy sauce, Sriracha and teriyaki sauce. Add sesame oil slowly, while whisking. Place the tofu in a glass baking dish, pour on marinade, and toss to coat evenly. Allow to marinate for at least 15 minutes, stirring occasionally so all the tofu is coated.

Spray a cookie sheet with cooking spray and spread the tofu out evenly. Bake for 15 minutes, flip the tofu and bake for another 15 minutes. Enjoy with soba noodles, or just by itself.

August 27, 2011

The Boy Bakes: Pie!

To fill the Miami-sized hole in this blog, I'm filling in for Esther this weekend.

Now it is time for one of my favorite baking activities, pie baking. I think it’s also the favorite one that I share with others. There is something therapeutic about making a pie. Not even eating it (though that’s pretty good too), measures up. While convalescing from my recent wisdom tooth surgery, I made a pie for Esther as a thank you for driving me home and putting up with me over the weekend. The pie was also a test run for an entry in the DC State Fair pie competition at Columbia Heights Day.


Didn’t know that DC had a state fair? We may not be a state, with all the fair powers that come along with it, but last year the first DC State Fair was held at Columbia Heights Day. As you may know from a previous post, I entered a raspberry rhubarb pie. It didn’t win, but that only meant I got to enjoy the leftovers. This year, I decided to do something a bit more seasonal.

In researching what exactly would be in season, naturally, I came across peaches. To find something to pair them with, I chose blackberries and added lime for a citrus tang. Adding some spices (cinnamon and nutmeg) lent a good depth of flavor. This pie was a little tart, so I will follow Esther’s suggestion and taste the berries before using them to decide on sugar. My recipe is adapted from a peach strawberry pie, so the measurements for the sugar and spices in the filling are flexible. If the mix looks watery before you put it in the pie crust, add more flour and tapioca pearls.


Peach Blackberry Lime Pie

2 pounds (about 3-4) peaches
1 pint (or a small grocery container) of blackberries
Juice and zest of 1 lime
½-¾ cup granulated sugar
⅓-½ cup all purpose flour
1-2 tbsp quick acting tapioca pearls (the secret to preventing a pie filling from oozing everywhere)
⅛ tsp salt
⅛-¼ tsp cinnamon
⅛ tsp fresh grated nutmeg
1 tbsp unsalted butter, cut up
1 egg, well-beaten (optional, see note)
milk (optional, see note)
2 pie crust halves (I use this recipe from Simply Recipes (the Pate Brisee), but with a bit more water)

Preheat the oven to 425F.

Prepare a large pot and boil water in it over high heat. Also prepare an ice bath by putting ice cubes in a large mixing bowl. Boil the peaches for 1 minute (a little longer is fine), drop into the ice bath. Peel the skin off the peaches and slice into a mixing bowl.

Add all other ingredients into the mixing bowl, and mix until combined. Let the mixture sit for 10 minutes to let the tapioca start working. While the mixture is resting, take out your prepared pie crusts.

Roll out the bottom crust and place it in your pie tin. Be sure to allow an inch of crust to go over the edge. Poke holes in the bottom of the crust with a fork (another piemaking trick for you - this prevents the crust from bubbling up while it’s baking). Add filling and dot with about a tablespoon of butter. Roll out the second crust and place on top. Pinch the edges to seal the crust. Cut slits in it with a sharp knife and brush the top with milk or a well-beaten egg (see note).

Put the pie tin/plate on a baking sheet and bake at 425F for 20 minutes. After 20 minutes, drop the heat to 325F and bake for 30-45 minutes or until golden brown and delicious. Cool on a rack and eat warm, chill it for the next day, cut it up and freeze it for later or take it to work let your coworkers enjoy.

Note: Brushing the crust with milk or egg is optional, but will result in a more golden crust.

August 26, 2011

All My Bags Are Packed

Actually, that’s a lie. They are not packed. But I do have a list and they will be packed before I go to bed tonight.

Because...I’M GOING TO MIAMI!!

Yes, in just 10.5 hours I will be boarding a plane (which also means in 8 hours I will be waking up...not as fun). And when I land, it will be sunny and warm and there will be palm trees!

The weekend will be full of fun in the sun, delectable food, some spa time and, of course, a little nightlife. I’ll try to post some of the gastronomic highlights for you.

In the meantime, MG will be acting in my stead, so look forward to a scrumptious pie post over the weekend.

Stay dry and safe East Coast!

August 25, 2011

Breakfast for Dinner: Huevos Rancheros

I love breakfast. I enjoy the meal (as in, waking up, making myself a cup of coffee and having something to eat while I read the news/emails) and I enjoy the food (as in, breakfast food! Pancakes, cereal, bagels, etc). I usually don't have time during the week to have more than a bowl of cereal/oatmeal or toast with peanut butter and some fruit. I'm not complaining, because I have a deep, devoted love of cereal, oatmeal and all things peanut butter-related.


However, for more complex breakfasts, like pancakes or eggs, I usually have to wait for the weekend. And when I can't wait for the weekend...brinner!!

Breakfast for dinner. Best invention ever. We actually had brinner twice this week - on Sunday we had blueberry pancakes and tonight: huevos rancheros!

MG whipped this up while I was at the gym - he reports that it was super quick and easy to make.  And I can happily report that it was delicious and filling and exactly what I was looking for.

Making the sauce, with fire-roasted tomatoes and green chiles.

He used this great recipe from Simply Recipes (minus cilantro, of course), seasoned some black beans with garlic powder, cumin and cayenne, and mashed up an avocado to go on the side. Also, props to him for cooking my eggs-over-easy *perfectly* (especially since they aren't his favorite way to eat them).

Key element.

Nothing like enjoying breakfast with the knowledge that in less than 12 hours, you get to enjoy it again. With a hot cup of coffee.

August 24, 2011

Special Edition: Earthquake!

Oh hey, there was an earthquake!

In case you were unaware. Yep, I'm an earthquake survivor.

Everyone went out on the street immediately after it happened. 

Some people were sharing a bag of Reese's cups.
Peanut butter and chocolate make everything better.

Everyone's OK and accounted for, and since nothing serious appears to have gone down, I can now discuss the humor of the whole event.

Starting with: D.C. + natural disasters = nightmare. I originally got on a bus, but traffic was awful - when, after 30 minutes, I had traveled 4 city blocks, I decided to hoof it. 

I stopped at Whole Foods for a bottle of water and a Kashi bar, since my lunch was interrupted. In other news, since we were not able to re-enter the building, I get to deal with my dirty soup bowl when I arrive at work tomorrow. Yay!

I survived the Great Earthquake of 2011!
This was before I realized it was going to take me almost 1.5 hours to get home.

Favorite quotes heard on the trip home:
Lady on bus - "This is God telling us what's what."
Man in suit on K Street, yelling into phone: "Nora! Nora! Do not separate! I am on my way up there! I will call the school! Do not leave Jake!"
Woman on her cell phone walking down the street: "Then when it started I ran. I wasn't waiting for her ass!"

Ah, the human bonds formed in the wake of a natural disaster.


The damage? Or just poor decorating skills? You decide.

The cats were fine though. If they were traumatized, I couldn't tell, because demanding constant attention is the norm.

I did actually learn some valuable lessons in case, god forbid, I ever experience a real emergency:

1. Always have good shoes for walking.
2. Glad I carry sunscreen in my purse for unexpected walks home.
3. Friends and family: if anything like this ever happens again, don't expect me to be able to tell you immediately that I'm ok. Most likely I'll have no cell phone reception.
4. Apparently I have no idea what to do in an earthquake. First thought "what the hell is going on??" Second thought "um...am I supposed to get under the desk?" Third thought "that seems stupid, what if it collapses on me?" I ended up just sitting in my chair while the building shook. BTW, what do you do in an earthquake? 
5. But I do have some good instincts! Managed to get my iPhone and purse before exiting the building. Did not manage to shut down computer.


I hope everyone else had an equally exciting, but ultimately humorous experience. Earthquake 2011!

Addendum: I don't mean to make light of what could have been a serious situation. There is building damage being reported around the District, but from what I've heard, nothing too bad, thank God. And the earthquake itself was pretty scary, especially since I had no idea what was going on. Definitely had shaking hands as we exited the building. But, I am happy that we all seem to have come through unscathed, so I hope my humor is taken in the spirit in which it is given: genuine relief.

August 23, 2011

Reader Survey: Vacation Temptation

The countdown has begun:

This Friday, barring a hurricane, I am heading to sunny Miami for the bachelorette party of one of my good friends. I’ve never been to Miami before, and this is a really fun group of girls, so I’m pretty pumped about the shenanigans in store.

Gonna be eating one of these.
Photo source: Wiqan Ang, Globe Photo

But my Miami trip is only the tip of the travel iceberg this fall. We have several weddings, a family visit, a much-overdue friend visit and an Ohio State football game on the agenda, all before November. Oy! All of this travel can create more than a few healthy eating challenges. I love food, so when I’m on vacation I want to be able to indulge a little and try something special, but still feel like I haven’t gone completely overboard at the end of the trip. I think I’m pretty good about making smart choices at restaurants, and I have a game plan in mind for the Miami bars (I’m not a big drinker anyways, so to avoid the other ladies having to carry me home, I’ll be alternating the hard stuff with club soda and lime).

 Tastes like home!
Photo source: Lucas Allen, Real Simple

It can still be hard, however, when every weekend you have an excuse to splurge (I’ve never had a Philly cheesesteak! Or cheese curds from Wisconsin! And I have to take MG to my favorite college dive spot before the game! And then there’s wedding cake. Times three). I’ve made a lot of lifestyle changes, so in the weeks between trips I’m not terribly worried about eating well and getting regular exercise in. When possible, I’m planning ahead (bringing my own breakfast and fruit to the airport, packing sandwiches for our road trips rather than stopping along the way). But being away from home that many weekends will definitely be a challenge.

And then there's this.
Photo source: Martha Stewart Weddings

My question for you today is: what is your big vacation food challenge and what tricks have you learned to overcome it? Answer in the comments!

Meatless Monday: Mac and Cheese

As previously mentioned, MG had his wisdoms out on Friday, so today we made my new favorite mac and cheese recipe to help with his transition into normal foods (mashed potatoes and oatmeal can get old pretty fast). Macaroni and cheese has always been a comfort food for me. My mom used to make it for me as a kid. I tried making her recipe once, but like most things mom-made, it just wasn’t as good as the original.


When I left for college, I always requested it when I came home for visits (with a side of lima beans - don’t ask me why, but I love lima beans!) And, my mom, being the mom she is, always obliged.

When I started trying to eat more healthfully, I worried that I wouldn’t be able to enjoy many of the foods I loved, mac and cheese being one of them. But, as I learned more about cooking and health, I started to realize that with a bit of creativity, you can make “healthy” versions of a lot of unhealthy dishes that are just as good, if not better, than the original.

One technique I discovered for cheese sauce is using pureed vegetables to stretch them, simultaneously cutting calories and adding good veggie nutrients. A popular veggie substitute is cauliflower - I found multiple recipes calling for this trick, and the reviews all seemed pretty positive, so a couple of months ago I decided to give it a go.

Cheese blend on the right, secret ingredient on the left.

 
Making a cheese sauce!

I have to admit, I was a little skeptical at first. As many meals can be for many people, for me, my mom’s mac and cheese is more than just a delicious dinner - it has nostalgia and comfort and home-iness in every bite. At best, I was expecting the low-cal version to be a passable substitute; something that I could go to fill my cravings, but never the real deal.

Pre-bake.

I combined two recipes - one from the Food Network and one from the NY Times. One major change I made was substituting full fat blue cheese for half of the reduced-fat cheddar called for in the recipe. It didn’t increase the calories too much, and the bite from the blue cheese gave the mac and cheese the rich, authentic flavor I was craving.

 
Can't wait to dig into this deliciousness!

The moment I took the first bite, I knew that I’d done it. Silly as it may sound, I think I achieved what cooking is all about - I created a dish both rich and comforting, one which evoked all the memories of childhood and home. The sauce melted in my mouth, with the texture that comes from using real melted cheese instead of a boxed mix. The flavor was spot-on - I couldn’t taste the cauliflower at all. Each mouthful was just the creamy goodness that both my stomach and my mind were dreaming of. The fact that it was about half the calories of the original were just the cherry on top.

The only way this dish could possibly be made better is if my mom makes it for me the next time I’m home :)

Almost As Good as My Mom’s Mac and Cheese (with Secret Cauliflower)
Adapted from The New York Times and The Food Network

Makes 6 servings

Ingredients:
8 oz pasta (shells, elbows, or rotini are good)
1 tbsp margarine
2 tbsp flour
1/2 tsp salt
1 cup skim milk
1/2 tsp mustard powder
1/4 tsp cayenne (the original recipe just calls for a pinch, but I like a little kick)
freshly grated nutmeg
1 small clove garlic, grated
salt and pepper to taste
4 cups cauliflower florets (about 1/2 head)
3 oz 75% reduced fat sharp cheddar (I used Cabot)
3 oz blue cheese
2 oz fat-free cream cheese
2 tbsp grated Parmesan
1/2 - 1/3 cup bread crumbs

Preheat oven to 350F.

Boil salted water. Cook cauliflower until very tender, 8-10 min. Remove with slotted spoon - set aside. Add pasta to water, cook to al dente (10 minutes). Drain, reserving 1/2 cup cooking water.

Meanwhile, prep a 8-inch glass square baking dish with butter or cooking spray.

Over medium-low heat, melt the margarine in a large saucepan. Add flour and salt and stir constantly for several minutes to make a roux (it will get very thick and the flour will get a little brown).

Slowly pour in the milk, stirring constantly until thickened slightly, about 6 minutes. Add cheese. Whisk until cheese melts. Add cauliflower and puree with immersion blender until smooth (if you don't have an immersion blender, you could puree the cauliflower ahead of time in a food processor or blender). If you need to thin the sauce, add a little of the reserved pasta water. Mix sauce with pasta.

Pour into prepared baking dish. Bake, covered, for 35-40 minutes. Remove foil, add breadcrumbs, and bake uncovered, 5 minutes more. Serve and enjoy! (I like hot sauce on mine, too. Check it out :)  )

August 20, 2011

The Lunch Box: Spicy Cumin Chickpea Salad

I looove chickpeas. They are such a versatile little food! I love them fried as falafel and pureed as hummus and curried as chana masala. I also love spicy things and garlic, so when I saw a recipe on The Kitchn for Warm Chickpea Salad with Cumin and Garlic, I knew it had to happen soon.


This is a delicious and easy recipe, and I want you all to go out and make it right now. The cumin and crushed red pepper make it nice and spicy (I doubled the red pepper, so it was even more spicy), and then the lemon and garlic give it another punch. But, then you get this nice cool cucumber and slightly sweet sundried tomatoes, and mmm, wow, good. Just good. In addition to tasting awesome, this is another one of those dishes that will make your apartment smell fantastic for a while - I mean, hello, sauteed cumin and garlic in olive oil?


As far as the recipe goes, I only changed a couple of things - I used 1 tbsp of dried parsley since I forgot to pick up fresh and I used a regular cucumber (seeded) rather than English. Although I drained the sundried tomatoes, they still add a bit of oil, so I reduced the olive oil from 3 tbsp to 2 with no problem. And the aforementioned doubling of the crushed pepper (but it was definitely hot, so you probably want to start with the ¼ tsp and taste as you go).


Although the yield doesn’t look like a whole lot, it’s actually pretty filling. I divided it into four servings and had one for lunch with a whole wheat tortilla and a handful of cherry tomatoes from a generous co-worker’s garden. I was definitely full. I didn’t even eat the melon salad that I’d brought along as part of my lunch.


Originally I planned to make it for lunches for both of us this week, but a bridal shower I hosted over the weekend yielded a lot of leftovers, so I didn’t end up making the salad until Wednesday night. MG had his wisdom teeth out today, so it was left to me to consume the entire thing. Eating the exact same thing for several days in a row makes me a little bored, so I decided to add some grilled shrimp to the chickpeas for dinners tonight and tomorrow (MG’s not a fan of seafood, so I’m taking advantage of his being on a mashed potato diet for the foreseeable future). To stretch it a little more into a dinner portion I sauteed some zucchini and summer squash to go on the side.

Keeping me company while I man the grill. 
(Don't worry, he's fine. He's just hamming it for the camera. And for pudding.)


That’s what I consider a great meal - something that can transition from easy workday lunch to heartier dinner with little extra effort. Chickpeas FTW!